
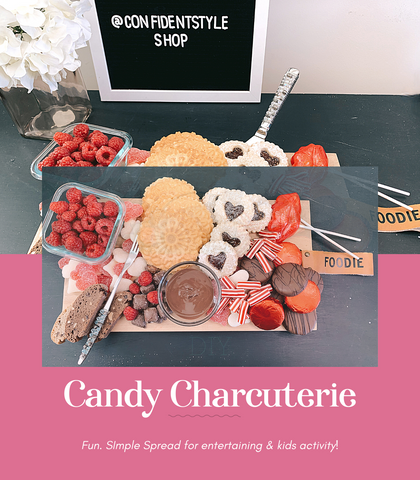
DIY Candy Charcuterie
I have not been a DIY'r in the past....
Step 1 - Pick your serving tray
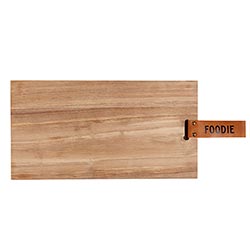
This one is the perfect size for a small gathering of 2-4 people, or if this is an activity your tackling with kids. This serving tray is available here
If you're serving a larger group of people some thing like this would be gorg! I love to incorporate different textures and natural wood elements. Found this small business on Etsy! Check their handmade boards out here
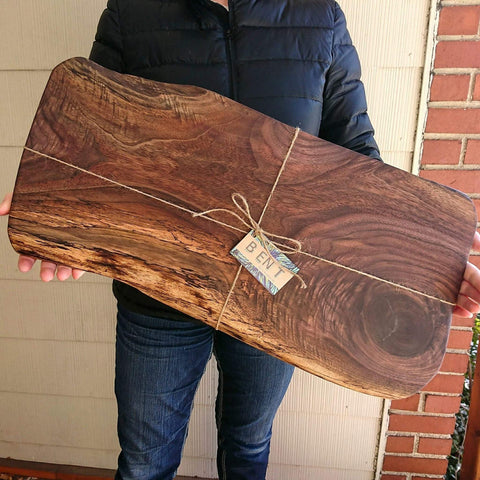
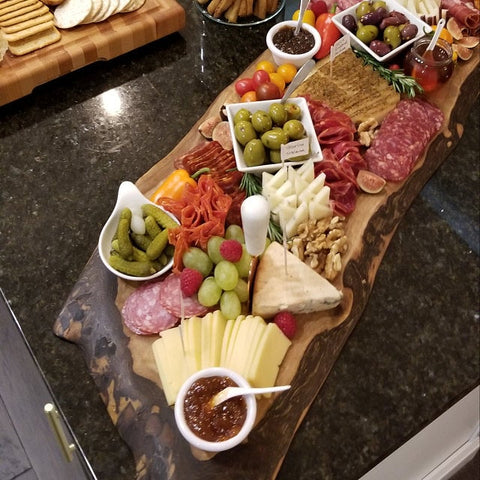
Pictures curtesy of BENTwood Goods on Etsy
2. Pick your elements
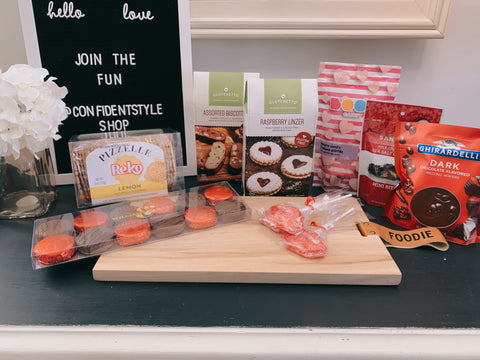
Full disclosure, all of these were purchased from HomeGoods with the exception of the Ghirardelli melting chocolate that I got from Target. Making it super easy and manageable to tackle in one day.
My suggestions when picking out elements is to give yourself different textures, tastes. Fresh fruit, chocolates (white/dark/milk), gummy candies, cookies, nuts (cashews, marcona almonds are my favorite)!
If I had more time, I'd probably bake cookies to add to our Candy Charcuterie tray. It's tough to find cookies that taste fresh from a box, in my experience.
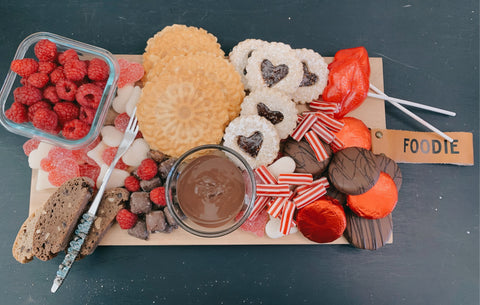
3. Arrange your tray
Pick out your dips you're wanting to use. I generally like to use bowls that are different shapes, but the same material (ie. glass, clay, metal) or go with a matching shape and material to be uniform. Position these on your tray. Generally using a corner and the center of your tray in order to give the eye something interesting to look at.
Begin filling in your tray. Pair things that are meant for dipping close to it's dip partner. If you need "filler" some floral filler like baby's breath, a few mini roses or a dusting of powdered sugar may do the trick.
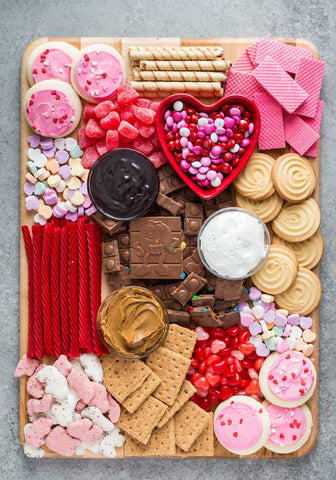
Image curtesy of Strawberry Blonde Kitchen
I hope you enjoy every step of this fun little charcuterie board! Remember, it's about the journey not perfection. It'll look different than you pictured and that is 100% ok. Post a comment below or tag us on your pictures on Instagram @confidentstyleshop, we want to see what you come up with!